As promised! Back with more pictures (lots of them in fact)! The tilings are completed!
Just to note that we had kept these pictures for a while. Check out the renovation milestones at the bottom of this page to see when the reno works were completed. I'll cut the story short and let the pics speak for themselves.
Enjoy!

Mr Nice Guy laying the tiles for our foyer. Yup, tiles, not timber planks, not laminates. Plain, old, trusty tiles that look like wood. Kudos to their excellent worksmanship. Cheers!

Tiling in the living room has been completed. The Contractor's bench makes a good substitute for our sofa (
for now at least).
 Completed work of the Living Room area (with skirting) and the Foyer.
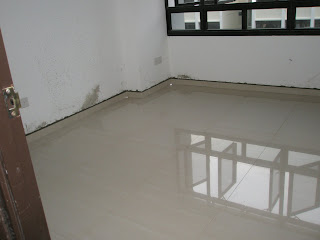
 Homogeneous tiles for all bedrooms as well. The air con trunking can be seen on the left just beside the aircon ledge's window.
 Tiling completed in the rooms. Very reflective. nice light distribution in the day.

A clearer view of the air con trunking. Starts from the aircon ledge, enters the MR and heads up to the ceiling (passing through to bedroom 2).
 Aircon trunking from the MBR joins the rest of the tribe at the top corner of Bedroom 2. Like a river, it then splits towards two directions. To the left, it connects to the aircon unit for Bedroom 2 before being linked to the aircon unit in bedroom 3 (thru a wall). Both aircon units are located above the door. To the right,it will be linked to the aircon unit located in the MBR. This way, the trunkings will not be visible in the MBR.
Phew, that was long. I hope you get what I was trying to say.
 Another perspective.
 Kitchen bases for the cabinets (hanging ones, not the full length kind) and the fridge (below the pails).

Across what you saw in the previous picture, lies another set of cabinets that would hold the kitchen sink.
Decided not to have top cabinets as it would make the kitchen feel even smaller.
 Concrete base for the washing machine. No idea why it was constructed this way. I reckoned that it was a design feature (hell yeah! we paid for this man!) since it's different from the conventional method where the contractors would just cement the whole area in a traditional kind of way (the entire length of the service yard).
Who knows?
 Totally cool! The overlaid toilet (just completed; still unwashed)!
Black tiles with running tone. A little bit of grey, some shades of blue and a great bunch of facination and joy.

Shower area, showing the colours more clearly.
I hope you enjoy these pictures. The next step of our reno work would be the painting of the apartment and the putting up of a false wall in the MBR for our wardrobe.
Till then, ciaos!
 Mr Nice Guy laying the tiles for our foyer. Yup, tiles, not timber planks, not laminates. Plain, old, trusty tiles that look like wood. Kudos to their excellent worksmanship. Cheers!
 Tiling in the living room has been completed. The Contractor's bench makes a good substitute for our sofa (for now at least).


No comments:
Post a Comment